Appliance repair for Lodi California: Light Switch on Frigidare, Electrolux
Here is another bright idea that is an easy appliance repair for do it yourselfers who have Frigidaire or Electrolux refrigerators/freezers. You might think duh everybody knows how to screw in a light bulb. Well, how many hands does it take to screw in a lightbulb? It might surprise you how it can be a lot of hands if you have to call for a costly service call just to put in the light bulb. So, why not just do it yourself, and save some bread?
Today we are going to diagnose and repair a Frigidaire refrigerator in Lodi California and give you all the steps required to do it yourself so you can save on appliance repairs near Lodi California.
Today we are going to diagnose and repair a Frigidaire refrigerator in Lodi California and give you all the steps required to do it yourself so you can save on appliance repairs near Lodi California.
- It is Always a good Idea to unplug appliances that use electricity when you are going to remove any electrical part, so you reduce the risk of injury. 120 jolts could really ruin your weekend or worse so just be safe and unplug the thing.
- After unplugging the refrigerator, you will want to test to see if there is any voltage coming out of the plug in the wall. You can use a multimeter set to volts, or they have these really neat plug in led testers or even just a night light to see if there is any volts coming out of the plug.
- Obviously if the refrigerator is running and staying cool then it is still getting power and you can skip testing the electrical outlet because there is going to be power there.
- Turn off the water to the refrigerator, you can do this by shutting the valve going to the fridge. The valve is sometimes found under the sink but commonly right behind the fridge on the wall.
- Now with a flathead screwdriver nearby, you can open the freezer door and locate the door switch and pop it out with the screwdriver by gently prying in between the switch and freezer. You’ll want to be careful not to pry too hard, potentially breaking something or scratching the freezer liner.
- Now that you have the switch out exposing the wiring, disconnect the wiring and test the switch for ohms. You will need a multimeter set to the ohms or continuity setting and with the leads connected to both prongs of the switch one negative the other positive you should get 0.00 ohms reading with the switch in the open-door position signaling no resistance to the continuity of the electricity in the circuit. If there are high ohms or an open circuit your light won't come on and you will need to put in a new switch.
- Assuming that the switch was bad, and you've got a new one to install, you will want to replace it and make sure the switch opens when the freezer door closes. In other words, you can put it backwards so just make sure that you put it facing the door so when it closes it presses on the switch.
- One other possibility of your light not coming on in the refrigerator or freezer is that the light bulb is simply burnt out, and another is that the wiring has a break somewhere in it.
- If you have a bulb that is not working, then you will notice that part of your refrigerator is looking dim and dark. If so you will need to remove some shelf and drawers to get to the light bulb cover at the back of the fridge. What a great motivator to clean out the fridge huh. There will be some work to do if your fridge is really full of food.
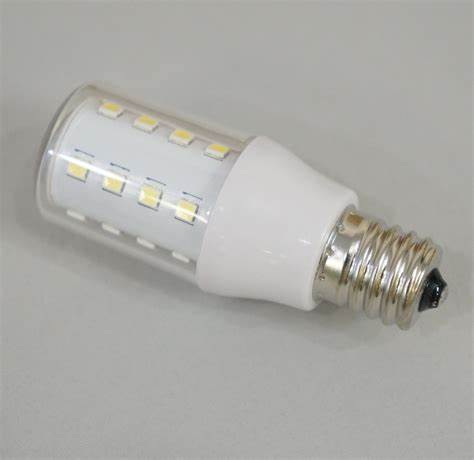
- Now that you have the light bulb cover off you can see the light bulbs and now you can replace them simply by unscrewing them and putting in the new ones. Now just replace the bulbs and put the cover back on.
- Now that you have the bulbs in, put the shelves back in and clean the whole fridge, you know you need too! It is good healthy practice to keep it clean near your food.


